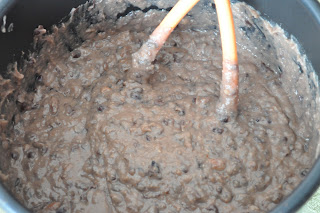
Using Your Food Storage- Homemade Refried Beans

I think the reason most people use canned beans instead of cook dried beans is the time involved. If you want to cook dried beans from a bag, you need to soak them for 8-12 hours over-night. Then when you are actually ready to heat them up, they still need half the day to cook! Sorry, but for me, that does not sound worth it. I'm not going to slave over the stove for hours just for a side-dish. So imagine my delight when I found I could cook beans in my pressure cooker in 35 minutes! No presoaking required. And what makes it even better is that beans freeze really well. You can just cook up a big batch, divide and freeze into smaller portions. Then when you want some, pull out a bag in your freezer and voila! As easy as the canned version but much tastier.
Ingredients
1 lb dry pinto beans or 1/2 lb dry pinto beans and 1/2 lb black beans
8 cups water (or substitute a can of chicken broth for the same amount of water for extra flavor)
1 onion, chopped
2 cloves garlic, minced
2 tsp chili powder
1/2 tsp cayenne pepper
1/4 tsp black pepper
1/2 tsp ground cumin
4 1/2 tsp oil (2 tsp of oil per cup of beans)
Directions
1.
Rinse and sort through beans and pick out any broken, shriveled beans or rocks/ pieces of dirt. You can soak them overnight if you want. It will reduce the amount of cooking time to 25 min instead of 35. But this is the beauty of the pressure cooker. You don't have to soak the beans!
2.
Heat oil in your pressure cooker. If you have an electric one, put it to the Saute option. If not, just heat it on the stove top. You need 4 1/2 tsp of oil. Oil is a necessary ingredient in pressure cooking beans because it helps prevent them from foaming and blocking your vent.
If you want your beans really authentic you should use lard for your oil. That is what real refried beans are made with. I happened to have some lard from some tortillas I made so I used half lard and half...
Bacon grease.
Are you grossed out? You shouldn't be. Bacon grease is a little flavoring trick my mom taught me. She would save just a little grease from bacon she cooked and use it to flavor our eggs when she made them sunny-side up. It is so good. You can't even taste bacon really, just a hint of something yummy.
Sorry it's so easy to get sidetracked. Anyway, bacon grease just adds more depth of flavor to the beans and makes them taste that much better.
3.
Saute your onions and garlic in the pressure cooker until the onions are translucent.
4.
Add spices. Did you notice there is no salt? You do not want to add salt when you are pressure cooking, you add it after.
5.
Add beans- it's best to only cook 1 lb at a time or depending on the size of your pressure cooker to never fill it more than 1/3 full.
6.
Add water and chicken broth. I just dump my can of chicken broth into a 2 cup measurer and add water to fill since there isn't enough broth to make 2 cups.
7.
Now just twist on the lid and make sure your pressure release knob is in place.
8.
Select High Pressure and 35 minutes and hit start. The machine will bring it to pressure then start the cooking time by itself. You don't need to do anything. Isn't technology amazing?
9.
10.
Drain your beans and use a potato masher to mash your beans up. You may want to reserve some of the liquid to add back it if you want them a little runnier.
11.
This is when you add in your salt. You'll want to do it to taste and probably more than you think. I used almost 1/2 Tbls. Refried beans are supposed to be salty, it's one of the things that make them taste good.
Now scoop these delicious, creamy refried beans into a bowl. They are 1000 times better than store-bought beans and definitely good enough to eat plain or with cheese on top. But if you can wait, they taste great in burritos and anything else you can think of too.
I hope you like them. My family sure did!
TIP: Freeze the left-overs into meal sized portions to use later. Beans hold up to freezing really well.


0 comments: