Showing posts with label preserving food. Show all posts

Strawberry Chia Seed Freezer Jam

I am loving summer already. Yes, it's fun having the kids home from school and having tons of fun and crazy adventures; but what I am really excited about is my garden! I transplanted my strawberries last fall because they weren't doing great where they were and now they are producing abundantly. So in honor of my first strawberry harvest this season, I am so excited to share my favorite strawberry freezer jam recipe with you all.


It is so healthy. Made with low sugar and chia seeds for extra protein and fiber. It is delicious on toast. or my oldest loves it on waffles instead of syrup. I also mix it into plain whole milk yogurt for my babies.

This recipe is so fast and such an easy way to save money on organic jam. And if you have been interested in canning but didn’t know where to start, this is the perfect gateway into the world of canning and preserving. I know it can seem intimidating, but try this freezer jam recipe first. It is so easy and fast, and will be the perfect confidence builder to try one of the many other step-by-step recipes I have on the blog. 

Read on for my super easy, low sugar, Strawberry Chia Seed Freezer Jam and stay tuned on the blog for many more healthy, plant-based, low cost, real food recipes and ideas.

Strawberry Chia Seed Freezer Jam
Ingredients:
·        3 cups strawberries, chopped
·        ¼ cup non-gmo sugar or honey -(I know a lot of people love to use honey because of its health benefits but it isn’t worth it to use in this recipe. This recipe gets heated, just for a bit, but it is enough to kill any of the beneficial things in honey. So I use cane sugar and save my raw honey for when it will make a difference. It is non-gmo and way less expensive than raw honey.
·        2 Tbsp ground chia seeds- you can totally use chia seeds whole but I just don’t like the texture or look of all the seeds so I grind mine. About 1 ½ Tbsp chia seeds will make 2 Tbsp ground. Or just use 2 Tbsp whole.
·        1 Tbsp lemon juice- this helps retain color and texture
2 half pint canning jars

Directions     

1. Combine the sugar and ground chia seeds in a sauce pan and stir til equally distributed. (if you are using whole seeds don’t worry about adding them until you add the lemon at the end. With ground chia seeds it helps to add them to other dry ingredients or they will clump and start to gel immediately after being added to a liquid and it is hard to incorporate them evenly. 

2. Add the chopped strawberries to the sugar and chia seeds. Stir around and let sit for 10 minutes. The sugar will macerate the strawberries helping to release their juices making them break up easier.

 3. Turn on heat to medium and gently mash the berries until they break up a little and reach your desired texture. I like some chunks but mostly spreadable.

4. Bring to a boil and simmer for 15-20 minutes until berries are soft.

5. Take off heat and add lemon juice and whole chia seeds if using. Stir til incorporated evenly. 

6.     Pour into half-pint canning jars and refrigerate for 24 hours then move to freezer. Take one out and enjoy over toast, pancakes or yogurt. 

Cheers, 

PP

How to string and hang dry jalapeno peppers

How to string and hang dry jalapeno peppers
Are you wondering how to use extra jalapeno peppers or how to make your own crushed red pepper flakes? This summer I grew 6 plants of jalapeno peppers and 6 anaheim peppers so even after making all my salsa, apricot jalapeno jelly and enchilada sauce, I still had about a gazillion peppers I needed to find a way to preserve. You can cut them up and dehydrate your peppers (see my post about dehydrating bell peppers). But I was already using my dehydrator on some eggplants so I decided to do it the old fashioned way.

All you need is a needle and some strong thread. Wash all your peppers first, then after you thread your needle, tie a knot at the bottom of your thread tail which will act as an anchor for the rest of your peppers. Grab your 2nd pepper and poke the needle not through just the stem or it will break when it dries. You need to poke it through the green base just under stem so you have a thick, solid foundation. Now pull the needle and slide the pepper all the way down to the one that you tied around the knot. It works best if you alternate which direction it is facing, left/right, front/back. And follow all the way up the string. You don't want too many. They are heavy at first. I think 20-25 worked great. Once done find a well ventilated area and hang for a few weeks.

After your jalapenos are dried, you can leave them on the string in your kitchen. They really are so pretty. Or you can take them off and put them in a plastic bag still whole. Or what I think is the best is to make your own crushed red pepper flakes out of your dried jalapeno peppers. Normally crushed red pepper flakes have cayenne peppers in them which makes it pretty hot. Using just jalapenos tames it a bit which is nice if your family is like me and can't really appreciate a lot of heat. Homemade crushed red pepper flakes can be used in anything that just needs a little kick

FYI- you can see in the picture I was experimenting by using some green jalapenos that hadn't turned yet. I was trying to see if they would dry more mild if they were green but they all ended up turning red anyway.

How to Can Apple Sauce

Fresh Picked Apples From My Dad's Tree

There is just something about Fall and apples.

The nice crunch and sweet burst of flavor. Mmm. I love apples.

And they are so versatile. Which is a good thing too because if you have an apple tree, chances are you have more apples than you can get though by just eating them plain.

Apples can be used in salads, rice pilafs, desserts like pie and cobblers, pressed for juice or made into my girls' favorite: Applesauce.

Making your own applesauce is so easy. It helps to have a few gadgets but I have made them without too.


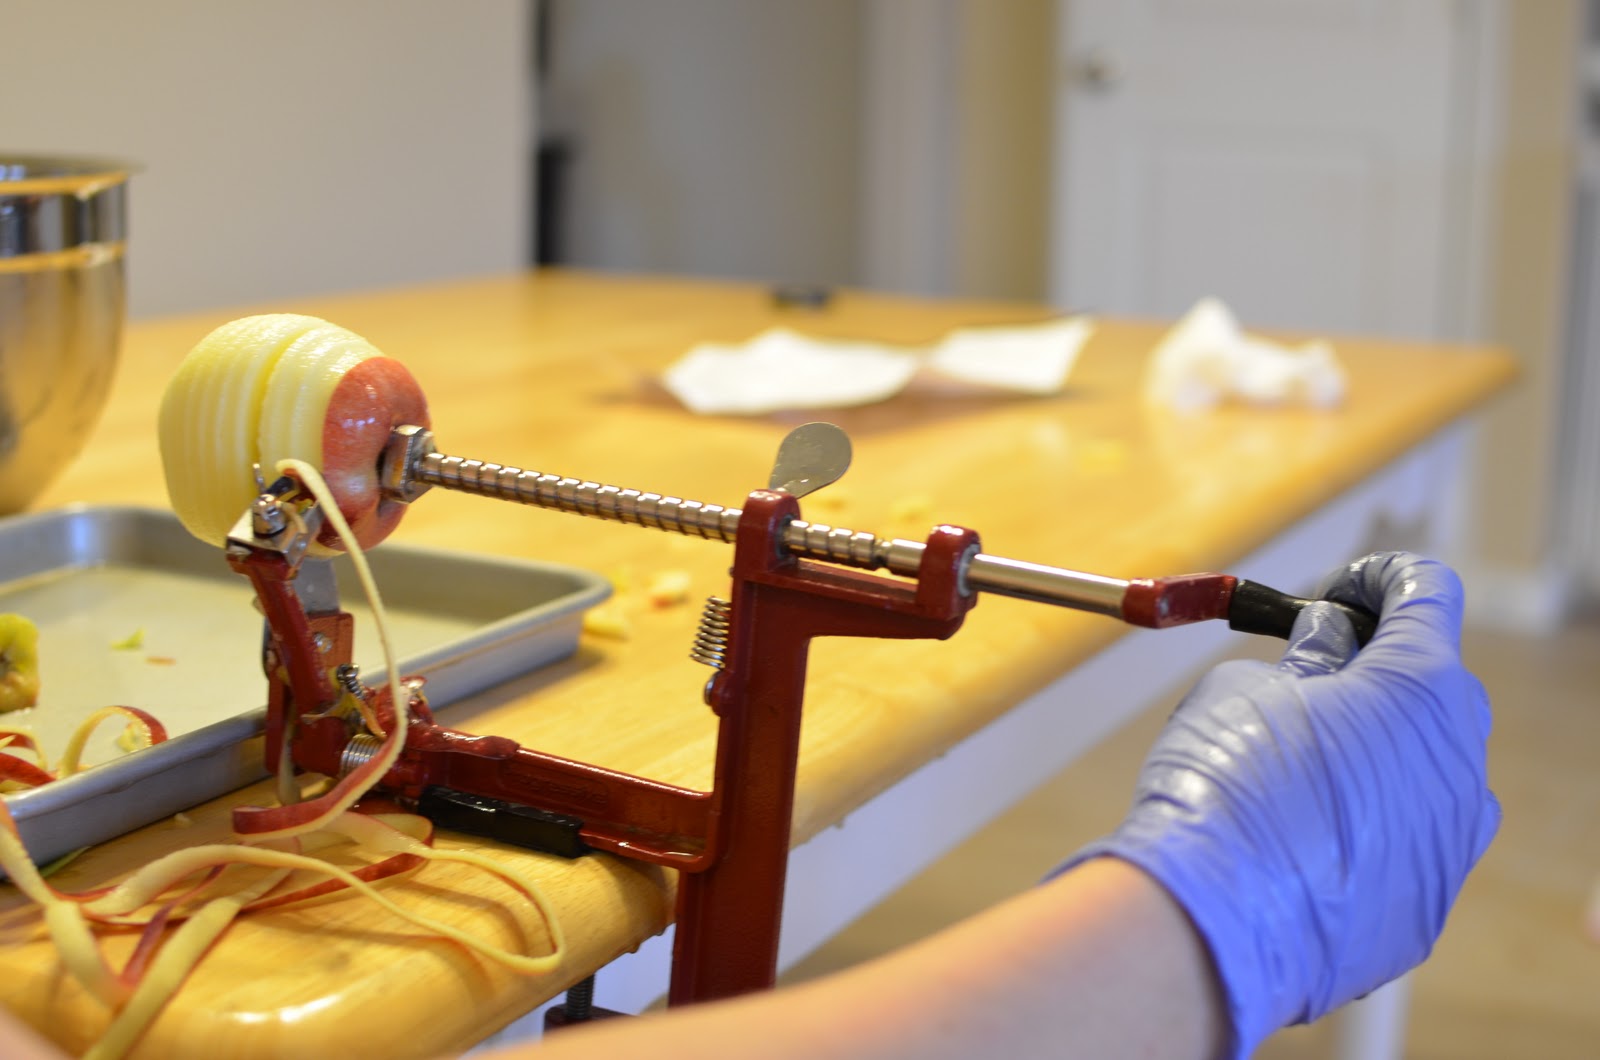
This is an apple corer, slicer and peeler. You can take off the thing that peels it if you want to leave them on for more nutrition. (And a pretty color of applesauce.) You can also use it on potatoes.


Stick the washed apple on. Slide it up to the peeler and start turning the handle.

Isn't this the coolest thing ever? Look how it peels and slices as it easily turns.


Pretty huh? Notice the core stays on the machine and the part of the apple you want slides off.


Put the sliced and peeled apples in a ascorbic acid or vitamin C water bath to keep from turning brown while you work on more apples. (At this point you could put the slices on a dehydrator for a healthy snack)


Once you have enough apples to fill a pot fill it with a cup of water simmer until the apples start to turn soft. The apples will start to make their own juice but just make sure it isn't cooking too high and starts to burn.


These are soft enough.


Next, carefully blend in batches. It is very hot.


At this point you can start putting it back in a new pot and then season with sugar or cinnamon if you'd like but I think that the applesauce is amazing plain and that's how my kids prefer it so I just move on to filling the jars.

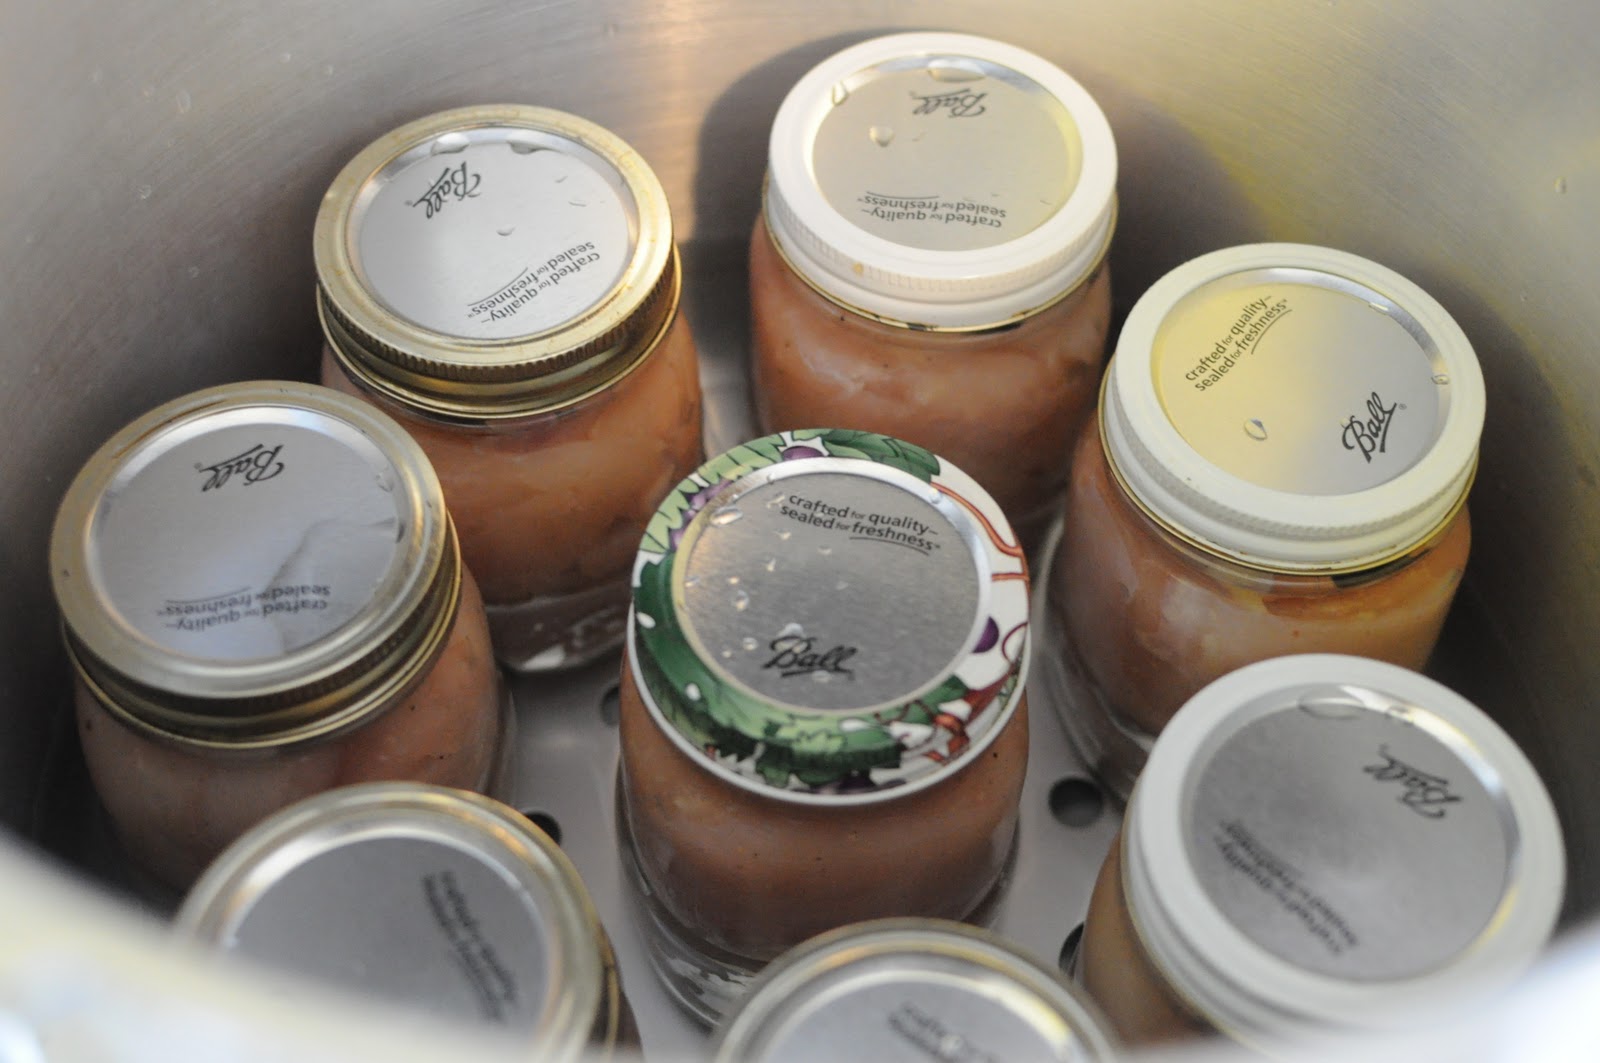
When you put hot food into the jars it is called a hot pack. This is what we do for applesauce so if you decide to make a big batch of applesauce one day and can it the next, make sure you heat it up again before putting in your jars. Fill to 1/2 inch of the top (headspace). Put on heated lids and rings. And process in a water bath canner for the time indicated for your altitude in the chart below.

Table 1. Recommended process time for Applesauce in a boiling-water canner.
Process Time at Altitudes of
Style of PackQuart Size0 - 1,000 ft1,001 - 3,000 ft3,001 - 6,000 ftAbove 6,000 ft
HotPints15 min202025
Quarts20253035

Take out of canner and leave undisturbed on a surface free of drafts for at least 24 hours to cool. When cool, wash jars and store without rings in a cool, dark place.


Freshly canned jars have got to be one of the prettiest sights in the world. It always brings a smile to my face.

Enjoy!

How to Make Apricot Nectar

I'm sure you've been wondering what I've been up to in my absence. I'll give you a hint.


I was an exchange student in Germany one summer and my host family always served a drink called Apricot Nectar at breakfast on the weekends. It was so delicious. I loved it but I've always thought it was just something they had in Europe. 

 The area where I live had a bumper crop of apricots this year and I was trying so hard to find something to make with them but all I could think of was apricot jam, fruit leather and dried apricots. We don't really go through that much jam and unfortunately I'd just bought a ton of dried apricots so didn't feel like making an more.

Luckily, one day found me at the house of an acquaintance when they were making Apricot Nectar and I had a flash back of how much I'd loved that stuff.

So I went right out and found some neighbors who didn't want their apricots. (I am the Provident Princess of course and nothing is more provident than free!)

Canning is always much more fun when you have help so my friend and I recruited our daughters for some of the grunt labor and got to work.

We washed, halved, and boiled the apricots in a little water for about 10 minutes. (you do not have to remove the skin.) We then used a juicer to run the apricots through and what came out was a nice, thick, nectar. 

NOTE: if you don't have a juicer you could use a high powered blender, sieve or foodmill to run the softened apricots through.

We sweetened each batch by juicing some pineapple (fresh or canned is fine) and honey. 

Ladled the nectar into jars and processed in a water bath canner for 20 minutes for pints and quarts.

15 min for sea level-1000ft
20 min for 1001-3000 ft
20 min for 3001-6000 ft
25 min for anything above 6000 ft.

We ended up making over 50 quarts! My family is loving it but surprisingly the way my girls like it most is warmed up a little. That is the way they first tasted it as we were cooking it all. 


Preserving Herbs: How to Freeze Parsley

Garden Fresh Parsley
Today I'm going to show you how to freeze herbs. 

One of my neighbors gave me a ton of parsley from their garden. I love fresh parsley but it doesn't keep that long. Maybe a week in a glass of water.

Being able to freeze herbs is a wonderful way to preserve them before they go bad but still be able to add a fresh herb taste to your meals. You just grab an ice cube and pop it in your food and all the water around it melts leaving the parsley in pieces.

Freezing parsley is so easy. This method can be applied to any herb you want to preserve like basil, oregano etc.

Directions:

First, wash your parsley.

Dry the herbs. I use a salad spinner. It pulls all the water off the leaves without bruising them.

Meanwhile, bring some water to boil.


Next, separate the leaves from the stems. 


Chop the herbs. This is how they are going to be once you add them to your recipes so make sure you chop them in pieces small enough to eat.

Grab an ice cube tray and fill it with the herbs.

Next, pour the boiling water over the herbs. The boiling water will blanch the herbs helping them to retain their best color and flavor. It also helps keep the parsley from developing a slightly bitter taste which herbs will do if they are just frozen without being blanched. 

Stick trays in the freezer and freeze. Freezing herbs in ice cubes is the best way to prevent them from getting freezer burn.

Once hard, transfer them to a freezer-safe plastic bag. Then whenever a recipe calls for fresh parsley just take one of these suckers out, throw it in and voila! Fresh parsley taste without the hassle of trying to always have fresh herbs on hand.

Tips:
  • 1 ice cube of herbs equals about 1 Tablespoon.
  • The ratio of fresh herbs to dried herbs is 3:1 
  • Freezing herbs in ice cubes is the best method but there are other ways: 
Dry Freeze

Once your parsley is washed and dried off completely, separate the leaves from the stems and spread them on a cookie sheet. Put that in the freezer.

Once they are frozen, transfer to a freezer-safe plastic bag and store. When needed, take a pinch of leaves out and use as recipe directs. 
Pros: less effort and steps than above.
Cons: might develop a slightly bitter taste although I haven't ever really noticed.

The Fastest Method: 

This is the way my host mom in Germany did it and it is by far the fastest and easiest. Once your parsley is washed and completely dried off, stack a bunch (stems and all) in a paper towel and roll once until the parsley is covered but there is still paper towel left.

Grab another bunch and roll again. You can see that I did 3 bunches in this paper towel. It is just a way to separate them a little better instead of freezing in a huge chunk.


Place in a freezer-safe plastic bag and freeze. When needed, reach inside and rip off as much as you need and toss the stems in the garbage. 
Pros: Less work upfront. A great method if you need to preserve a lot of herbs at once.
Cons: May develop the slightly bitter taste although I've never noticed. You also have to put in the work to separate the leaves and stems later while you're in the middle of cooking.


How to Can Ground Beef

I've been so busy that I haven't felt like posting lately. I have been canning though, I assure you. I've been keeping my eye on the price of ground beef for a while now and finally one of my grocery stores had it for $1.49/lb.
I hadn't ever canned ground beef before but I was looking forward to it since my chicken turned out to be so easy. 

Let's get started
Prep work. 
  • Make sure your jars are clean.
  • Start warming your jar lids on the stove. Do not boil, you just want the rubber rings to be gummy.

1. Get your meat. 
Usually you want to get the leanest meat you can. Canning it makes it super moist so it's a great way to use the less expensive cuts of meat and still have them be really juicy. The stuff on sale at my store was only 73% lean though so I made some alterations to the precooking process.

2.
Working in batches, brown meat. It took me about 3 batches to brown 5 lbs. I only did 5 lbs at a time because I changed the recipe for the next 5 lbs. And it is way less intimidating that way.

You don't have to brown your meat all the way, it's just for texture when you open the can. Some people don't like it really soft so the browning gives it some definition. As my meat was getting done, I would drain it, then stick it in a stock pot with a little water on low heat to keep it warm. 

Also, here's a little trick I learned about browning ground beef in Chemistry. If you stick a little water in the pan while it browns, the fat and the water don't like each other and the water keeps the fat from reabsorbing into the meat. Sticking the meat into the stockpot works the same way. That is why I wasn't too worried about using a fattier package of ground beef than usual. 

3.
When each batch of meat is almost done, dump some onions in the pan to cook a bit. You don't want them in there too long because they have enough time to cook in the pressure canner. You just want to mix them evenly in with the meat. I used about 1/2 and onion per pound of meat.

4.
Line up your clean jars and using a funnel, carefully spoon your meat into the jars. About 1 lb of beef fits into each pint sized jar. You need about 1 1/4 inches of head space because the ground beef won't expand like the chicken did since it is already cooked.

5.
But, because I'm not putting the meat in raw like I did the chicken breasts, the meat won't make enough of its own juice so I need to add some. This is some of the water from the stock pot that held the beef. It turned into a mild beef broth that I used to fill my jars with. I just used my gravy separator (which by the way, I love!) to make sure I didn't put any fat back in. Fill the jars to cover all the meat, keeping in mind your head space. As you pour, take a rubber (or non-metallic) spatula and work out any air bubbles that might be in the meat.

Option 2. 
On my second batch of ground beef, I used tomato sauce to fill my jars with. These jars I'm planning on using in spaghetti, sloppy joes, chili or anything that I would normally end up putting tomato sauce in anyway. This way the meat is already flavored. I watered it down by a ratio of 1:1 to make it easier to pour.

6.
If you want your meat seasoned a little bit more, put 1 tsp of pickling salt in each pint. The flavor will mix as it is in the pressure canner. Make sure only to use pickling salt. Regular table salt will make your jars turn foggy. You could also just put 1 tsp of  beef bouillon in instead.

7.
Make sure to wipe the rims of your jars really well with a hot, clean towel. You don't want any grease on the rim to prevent your lids from sealing.

8.
You are ready to put the lids on the jars. Use a magnetic lid lifter to avoid burning yourself. I've don't this one too many times when trying to just use a fork to lift them.


9.
Put your jars in your pressure canner, and follow the instructions that came with it for pressure and timing based on altitude. This is the Presto 1781 23-Quart Aluminum Pressure Cooker/Canner. For ground beef pints at my altitude I used 13 lbs of pressure for 75 min. For a step by step process in pressure canning check out my post on canning chicken

10. Ta Da!

So they might not be the prettiest looking jars of food, but believe me, it tastes fantastic. The tiny bit of congealed fat at the top is totally normal. I made tacos out of my first jar and no joke it was exactly like the taco meat you get at Taco Bell. Mmmm so good! I'm very happy with how it turned out. 

Don't forget to label your jars! This meat will stay good for a year or longer. If you have a jar that didn't seal, just stick it in the fridge and use it soon. It's fun to see how your meat turned out anyway.

As with any canned meat, the USDA recommends boiling/ heating the meat for 10 minutes once it is opened just to make sure all bacteria is killed.

Ground beef is one of the things I'd been wanting to try canning for a long time. I'm glad I finally did it and am happy to post about it. I'd love to hear some of the things you've been wanting to try too. 

Happy Canning

How to Can Chicken

I love canning. I love that I know exactly what is going into the food I feed my family. And, I love making use of a good deal. I don't know if it is just the accountant in me, but I love knowing that I am saving money. 

One of my sisters-in-law invited me to a home canning presentation over the summer where I tasted home-canned meats for the first time. They were so good. So juicy, great flavor. Since then, I've been wanting to try canning meat. I was a little intimidated by the fact that you have to use a pressure canner. Water bath canners cannot get hot enough to kill all of the bacteria in the food. 


I put it off until one of my grocery stores had a deal on boneless, skinless chicken that I couldn't resist. I ended up buying 15 lbs.

I was surprised by how easy it was. You need to follow the instructions that come with your pressure canner. They can vary slightly, but sometimes it's nice just to see the process.

The nice thing about canning meat is that you can put it in the jars raw. They cook in the pressure canner for so long that there is no need to cook beforehand.

Directions
Prep work. 
  • Make sure all your mason jars are clean. Technically, you don't need to sterilize them because the pressure canner cooks them at such a high temperature that they get sterilized then. I still sterilize them beforehand though, I guess I'm just paranoid.
  • Warm your jar lids in water to get the gummy rings softened. Do not boil.

1.
Get your chicken and cut off any visible fat. You can put the chicken in as whole breasts but I wanted to slice mine into tenders. That way I figured I could reduce air bubbles. I sliced my chicken and seasoned with a little pepper as I went. You don't need to season them if you don't want to though.

2.
Stuff your raw chicken into clean mason jars. 1 pint jar holds about 1 pound. Leave 1 1/4 inch head space. The chicken will release its juices as it cooks and you don't want it to touch the lids or it might make them not seal.

               
I put chicken base Better than Bouillon in my jars. It just intensifies the flavor of the chicken as it cooks.You can use a bouillon cube or powder instead if you want.

3.
Wipe all your jars with a hot towel to remove any chicken juices that might've gotten on the rim. Use a magnetic lid lifter to lift lids out of hot water and place on jars. Screw rings on til finger tight. They have to be able to release some air so don't screw them on ridiculously tight.

4.
Place jars on rack in the pressure canner making sure that they don't touch. They need to be on the rack so they don't touch the bottom of the canner directly and get too hot. Follow pressure canner instructions for amount of water to fill. Usually there is a line on the canner that shows you how much. About 11/2-2 inches.

5.
Place lid on your pressure canner following directions from manual. I'm using the Presto 1781 23-Quart Aluminum Pressure Cooker/Canner. Turn to high heat. Vent steam for 10 minutes. Place on vent block and bring to pressure depending on altitude. Once pressure is reached cook for 75 minutes for pints. Slowly turn down the temperature as it builds pressure until it is just right. You need to babysit the canner to make sure that the temperature doesn't drop below what you are supposed to can it at or you will have to bring it to pressure again and start the time all over. It isn't as hard as it sounds. You can find a setting on your stove where it will hover around the right temperature without building or losing pressure. For me, it was on 4. If you have a gas stove it is much more precise.

6. Once the 75 min are up, remove the canner from heat and let it slowly release pressure. You do not need to do anything, this happens naturally as it begins to cool. Once the pressure gauge reads zero and the pressure indicator drops, you can take off the lids, and remove jars. Place them on a towel to cool. 

7. Don't forget to label your jars. Canned chicken will last for over a year, but I doubt you will be able to wait. I made Chicken Enchiladas with the chicken and my husband without knowing that I used my canned chicken declared them my best yet! He was nervous about me canning meat because he was afraid of how it would taste so I didn't tell him til he'd already eaten it. Tricky, tricky, I know.

ENJOY!

When I first opened the can, I tasted it to see how it turned out. It smell and tasted just like the canned chicken you can get at the store. I buy that usually just for making chicken salad sandwiches but with your canned chicken, you can use it to make anything you usually need shredded chicken or chicken chunks for. And it is so easy to shred. I basically just pressed my fork against it and it fell apart. 

It is recommended to heat/boil canned meats for 10 min after opening just to make sure that any bacteria is killed. If you are going to use it in a casserole or other dish that needs to be heated anyway, I don't bother with preheating, I figure it gets hot enough for long enough while cooking.