Showing posts with label How to's. Show all posts

How to Plant Garlic

I am really excited to share this post today. It's all about how to grow garlic at home.

Growing your own garlic is so easy! Anyone can do it. Seriously.

Have you ever had some store-bought garlic so long that it started to sprout? Perfect, you're halfway there. If you just stick that clove in the ground and it will grow into a head of garlic next summer.

Now is the perfect time for planting bulbs; flowers or garlic. Anytime after the weather turns cooler in the Fall is a great time to plant. You just need make sure you plant before the ground freezes. Luckily, with how weird the weather has been this winter our growing/planting season has been extended.

Charlotte and I spent a wonderful morning in the garden and it was so fun having her help me with the planting. Though of course she just wanted to dig them all out afterwards.


Directions:
All you need is a head of garlic from the store. Just the regular kind you buy to cook with.

Break apart the head of garlic to get the individual cloves. One clove will grow into an entire head of garlic next year. One of my friends brought me home some popular garlic from a recent trip to California. I'm really excited to plant it. It's been so hard not to use it all because it is so delicious, I hope it grows well here. Fingers crossed.

You only want to plant the biggest ones because they will yield the biggest crop next year. Just save the small ones to use in the kitchen.

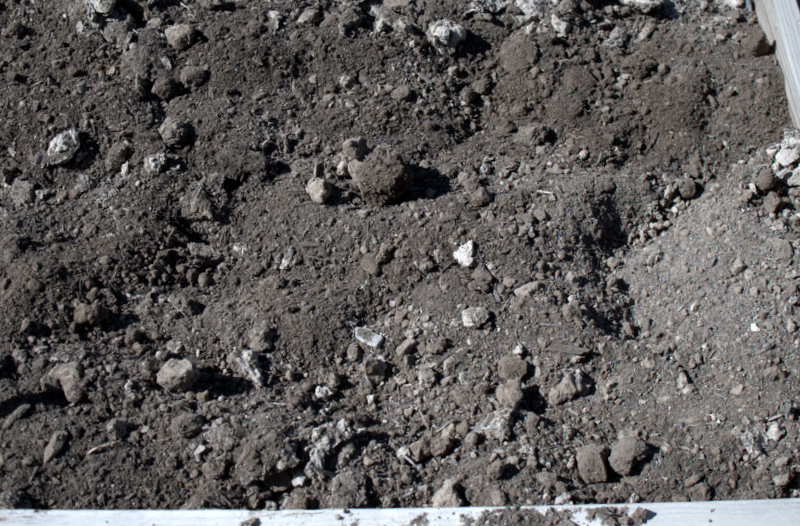
Go out to your garden and turn the earth under. Basically just loosen up the dirt and add in any compost you might want to.

Once your dirt is turned over, dig holes 6 inches apart all the way around and about 3-4 inches deep. If you don't have raised garden beds you might want to think about leaving space for a walkway depending on how many cloves you plant.

I use a stick like this to dig. I feel a little like a cave woman digging in the dirt with a stick but hey, it works. And Charlotte loves it too.


Next stick your garlic clove in the ground with the point sticking up. You will want the top of the garlic about 2 inches from the top of the dirt once you fill it in. And, doesn't everyone garden while juggling a baby? Charlotte is learning young.

 
Cover and repeat for all remaining cloves.  I like to dig one hole at a time because my dirt is really loose and falls back into the holes easily making it harder to go back and stick the cloves in. But you could dig all your holes first, then stick in all the garlic cloves, then cover all at once.

You're done.

See what did I tell you? Easy! And you'll love cooking with your homegrown garlic next year.

Tips:

  • you may want to put a layer of mulch like leaves over the dirt to help insulate the garlic over the winter.


How to Dehydrate Mushrooms

Dehydrating vegetables is such a great way to use up extra food. Dehydrated food loses 75-90 percent of its moisture making it a very effective way to store a large volume without needing too much room.  And drying mushrooms is one of the best vegetables to dehydrate because they keep their flavors so well.

You can dehydrate things using your oven. But with the cost of energy as high as it is, I don't think it's very economical to dry them like that.

On the other hand, dehydrators are very energy efficient and are an easy way to dehydrate big batches of food any time. Dried mushrooms can be used almost anywhere fresh ones are called for, except perhaps salads. But even then dried mushrooms would taste good crumbled up and sprinkled on top for a little crunch.

Mushrooms are so easy to dry. So when my local store had them on sale, I stocked up.

Directions:
To start, DO NOT wash your mushrooms. You can wipe them off gently with a paper towel, but washing them whether for dehydrating or cooking is a no no. It will make them rubbery. Once they are dehydrated and you want to use them, you can wash them then.

OK, now that we got that out of the way, let's get back to the mushrooms.

Slice your mushroom about 1/4 inch thick. I bought the pre-sliced ones because I thought it would save time but I found out that there were quite a few I needed to slice smaller anyway.


Lay your sliced mushrooms on one of the trays of your dehydrate. Repeat. Repeat. Repeat until all of your trays or full or you run out of mushrooms. Turn on your dehydrator and let mushrooms dry for about a day. Mine were done after about 14 hours. I put my trays in after dinner, rotated them before I went to sleep and dried them overnight. They were done when I woke up.

Look how much they shrink down. You can tell your mushrooms are done when they are brittle and snap easily between two fingers.
Place in an airtight container. If you have oxygen absorbers your could put one in with it. You don't have to put them in a bottle but they won't get broken this way. This quart jar holds the mushrooms from two 8 oz. containers of fresh mushrooms.

Store these in a cool, dark place for 6-12 months. You could also extend the life of your mushrooms by freezing them from this point.

To Use:
Wash, then add to recipes that will be cooked for at least 20 minutes. Otherwise, soak in liquid (hot water, broth or wine for added flavor) for an hour or 2 before using. 

Tip:
You can also eat these plain like chips. For more flavor, sprinkle with seasoned salt before drying. They have a really nice crunch and earthy flavor which your kids will love.

How to Make Pumpkin Puree in a Pressure Cooker

Wondering what to do with your pumpkins now that Halloween is over? A great way to use left over pumpkins is to make pumpkin puree. 

Pumpkin is actually really good for you. It is packed full of Vitamin C, Riboflavin, Potassium, Vitamin E, Thiamin, Vitamin B6, Folate, and minerals like Copper, Manganese, Iron, Magnesium and Phosphorus. 

And get this. 

One cup of pumpkin provides 245% of your daily Vitamin A allowance. 

Now that you know how good it is for you, I'll show you how to make your own pumpkin puree from scratch. 

Directions:
Gather your pumpkins. Don't try to use a pumpkin that has been carved and hanging out on your porch for weeks. 

I didn't carve any of my pumpkins, I just stacked them next to each other for a more 'harvesty' display rather than 'Halloweeny'

This is a pie pumpkin also known as sugar pumpkins. They are smaller than the carving pumpkins and have a sweeter taste. You can use a carving pumpkin, the taste will just be a little less pronounced. But pumpkin recipes always call for so many strong spices like cinnamon and nutmeg that a carving pumpkin would do just fine.

Slice it in half with a sharp knife.

Scoop out the guts and cut out the stem. I have found that using an ice-cream scoop is perfect for getting all the stringy seeds out.

Chop up the pumpkin. I cut it into about 8 chunks.

Next throw them in your pressure cooker. If you don't have a pressure cooker you can lay them on a cookie sheet and cook them in the oven for 1 1/2 hrs at 375.

This is what I love about pressure cookers. I could cook this in the oven for 1 1/2 hours or I could throw it in my pressure cooker for 4 minutes! It saves so much time and energy costs.

When the 4 minutes are up, use the quick release method to release the steam and let your pumpkin pieces cool. I moved mine to a plate to cool faster.

After your pumpkin has cooled, scrape off the flesh and toss it in a blender or food processor. One pumpkin will yield anywhere from 2-4 cups of puree.

Blend until smooth. (If you have trouble, add a little water. Just decrease the amount of liquid called for in your recipe later) You may want to do this in a couple of batches.

Doesn't that look so much better than what you buy in the can? Why would you ever buy canned pumpkin puree now that you know how easy it is to make yourself?

You can use this puree for pumpkin pie, pumpkin bread, pumpkin pancakes, pumpkin muffins or baby food. 

I am proud to say that I have never bought a jar of baby food. I love making my own baby food and knowing my girls are getting the healthiest food possible, not loaded with a ton of preservatives, salt or sugar.

This pumpkin puree freezes so well.

For the baby food, I just pour it into an ice-cube tray and then transfer the cubes into a freezer bag once they're frozen. The cubes make the perfect serving sizes so I just grab one or two out of the bag when I need one.

I also freeze puree for me to cook with later. (You could can it yourself if you would like but I feel freezing is more convenient. One store-bought can of pumpkin puree is about 1 3/4 C. But, I freeze mine in 1 cup measurements.There are recipes like pancakes that don't call for a full can so I like them in smaller increments because I can always just double up if I need to.

 I found the cleanest way to get the right amount of puree into my bag is to put my bag into the measuring cup first then fill it with the puree. That way you're not scooping the puree then trying to get it all in the bag without making a mess. 

Label your bags and freeze for a later date.

Or if you can't wait...

Pull out your favorite pumpkin recipe and get cookin'. I made chocolate chip pumpkin bread. It has such a warm, comforting taste. Just perfect to eat during the blizzard of a snow storm we got hit with last night.


Storing Water

My 55 gallon drum and bottled water storage

The crisis in Japan has been making me think about emergency preparedness a lot. Now, on top of everything else, the Japanese government has warned its citizens that there are high levels of radiation in the drinking water.

The radiation levels in the water aren't dangerous to adults but infants and pregnant women are being told not to drink tap water. Of course, after that anouncement there wasn't a water bottle left in a store and there were many people who needed clean water to make formula for their babies.

It made me think about how nice it would be if some of those families had their own supply of clean water stored. Imagine the peace they would feel not to have to rely on the government to bring them enough water to keep their kids alive or to not have to wait in long lines at a store with only a small hope that there would be some left.

One gallon of water per person per day for two weeks is the minimum reccomendation to store. Pregnant and nursing women, children and ill people will need more.

Storing Water
You can buy commercially filled bottles but they should be used before the "best used by" date because the plastic bottles will start breaking down.

Water does not need to be disinfected before it's stored if it comes from a good, pretreated source. If you decide to fill your own containers follow these guidelines:
  • Use only food-grade containers (There are special gallon drums that come in a range of sizes. I use a 55 gallon drum but there are some in 33, 15 and 5 gallons too.
  • Avoid plastic containers that are not embossed with the "PETE" symbol
  • Do not use plastic milk jugs. the do not have a good seal and can become brittle
  • Plastic soda bottles (like 2 liter soda pop bottles) are safe to use
  • Never use containers that were previously used to store non-food products
  • Wash containers with warm soapy water and rinse. Before rinsing, sanitize the container by adding water and then 1 tablespoon bleach for each gallon of water. Shake well, turn bottle upside down and let stand for 1 minute, then pour out the bleach water and let the container air-dry.
  • Rotate your water by periodically emptying and refilling containers
  • Store containers in a dry clean place, away form direct sunlight and heat sources
  • Do not store water near gasoline, pesticides, or similar products, or anything that emits odors
  • If there is a concrete floor, place containers on top of a peice of wood/plywood that has been placed on the floor. (A wooden pallet is a great option- as you can see above that's what I use)
If for some reason you haven't stored water or you find yourself away from your supply and in an emergency situation there are a few ways to disinfect unclean water sources. (Not if it has radiation though)

How to Purify Water
If the water is cloudy, filter it through clean cloths or allow it to settle, and draw off the clear water before using ONE of the following methods to disinfect the water:
  • Boil at a rolling boil for 10 minutes
  • Add 8 drops of liquid chlorine bleach (regular, unscented and unexpired) per gallon of water. Let sit 30 minutes.
  • Add 20 drops of 2% iodine per gallon of clear water or 40 drops pergallon of cloudy water. Let sit 30 minutes
  • Add water purification tablets according to directions on the package
  • Alwys use clean or purified water to wash any parts of the body that have come in contact with surfaces contaminated by flood waters.
 Additionally, you may want to consider having a water filter in your disaster supplies grab bag. My husband and I are considering one these. It can filter 13,000 gallons of water and has a 20 year warranty. You can read more about it here.

I hope that we can all be inspired to prepare for the emergencies we will face before they happen so that we can keep our families healthy and help those around us as well.

My prayers go out to all those suffering from the Pacific tsunami and related events in Japan. If you feel you want to contribute to the efforts of the Red Cross in Japan you can do so here.

How to Use a Pressure Cooker

I think I've decided that the pressure cooker/canner is one of the best inventions ever. You can take something that usually takes forever to cook and have it done in a fraction of the normal time. My mom had a pressure cooker but gave it away when I was little after a disaster in the kitchen. So I grew up always super nervous about these mysterious pressure cookers and horror stories that seemed to follow them.

My sweet husband knew that I was getting interested in cooking more and wanting to try pressure cooking. So for Mother's Day last year he got me this pressure cooker.

It was a great idea. It is electric so it takes out a lot of the guess work and has built in safety features which make it pretty impossible to screw up. It is great for a first timer. You pretty much just push buttons and leave it alone until it beeps at you.

I thought it would be nice to do a step-by-step of the process to help you feel more comfortable with the idea and hopefully encourage you to want to try it.

Instructions
1.
Clean the cooking pot and put it inside the pressure cooker. The nice thing about this pressure cooker is that the inside pot is non-stick so it is super easy to clean up. It's like the inside bowl of a rice cooker if you have ever used one of those.

2.
Get the parts together for the lid. It comes with the outside lid, a rubber sealing ring (gasket), and a support cover for the sealing ring.

3.
Assemble the lid parts by looping the rubber ring around the support cover then pushing it through the rubber grommet (rubber piece in the middle) onto the lid.

4.
Dump your food inside. Today I am making black beans. They have already been rinsed and sorted. You can make so many things in a pressure cooker. Potatoes, artichokes, and meat roasts are all things I have tried and have been amazed at the amount of time it saves. 

5.
Dump in your water. All recipes for pressure cookers will call for a little water. The steam is what builds the pressure inside and cooks the food at such a high temperature so quickly. 

6.
Fit and twist the lid onto the cooker and add the pressure limit valve. Notice how the 2 dots line up? They need to. This is what controls the pressure. It doesn't lock into place. It just rests lightly because it needs to be able to move to release steam if the pressure gets too high. Also, this is where you manually release pressure when a recipe calls for the 'quick pressure release method'. I hold tongs and push the knob a little so I can stand far away from the hot steam that comes out.

This red valve is the pressure indicator. It floats up to the top to let you know when there is pressure inside. Also, as long as the red float is up the machine will not let you unlock the lid or open it. This is one of the many safety features it has to prevent injuries. 

7.
Now's the easy part. Select High Pressure from the menu button and type in the time for how long your recipe says the food needs to cook. Unsoaked beans need 30-35 minutes. I want mine breaking apart and soft so I did 35 minutes. Hit Start.

The pressure cooker will build up pressure and once it is reached, the time will start counting down. You just need to sit back and relax with a good book.

 See how the red pressure indicator is up? This means there is pressure inside.

8. Look at your recipe and see if it needs the quick pressure release or normal pressure release method. The normal pressure release method is the easiest. Once the timer beeps letting you know the cook time is over, the machine will start to drop the pressure by itself.

You just need to wait until the red pressure indicator is down. This usually takes 20-30 minutes.

9.
 Twist off the lid and look inside. Mmm it smells so good. Some food, like beans will need to be drained. Do that now.

10. 

Your food is done! Check back next week and you'll see what I made these beans for. It's one of my favorite ways to make my food healthier.

I hope now that you know how easy pressure cooking is that you will give it a try.

Good Luck!

How to Make Healing Turkey Bone Broth

Mmmm wasn't Thanksgiving dinner delicious? I have to say that I stuffed myself thoroughly and enjoyed every minute. Mashed potatoes and gravy are usually my favorite dish but this year my new sister-in-law made the best stuffing I have ever tasted. I had 3 helpings!

Even with how good the Thanksgiving meal is, I still can't eat the same dish day in and day out. But there is always so much food left over.

Being provident means to put all of your resources to use and let nothing go to waste. One of the things I wanted to try this Thanksgivng was to make my own turkey stock and can it for my food storage. Since it is a low acid food it needs to be pressure canned.


Any kind of stock is easy to make but pretty time intensive. Get started early in the morning and you will enjoy the delicious aroma that fills your house all day.

Ingredients
Turkey Carcass- body, wings and legs,
3 Celery stalk ribs with leaves still attached
3 Carrots, unpeeled but with the tops cut off
1 Onion, quartered with the skin still on
3 Cloves of garlic, whole
6-8 Peppercorns
2 tsp Salt
2 tsp dried thyme
1 tsp dried sage
1 bay leaf

Directions
1. 

Gather your left over turkey carcass, wings and legs. Strip all the good meat off and save it for later. Throw the carcass in a stock pot with all your vegetables. You may want to break or chop your carrots and celery in thirds to help them fit better. Make sure they are washed really well but not peeled.


 Sometimes I just use the ends of my celery instead of the long ribs. That way you can use the ribs for something else and the ends don't go to waste. Be sure to add the leaves too. They add great flavor.

2. Fill the stockpot with enough water to cover everything. Turn stove on to med-high heat.

3.

Gather your seasonings and make a bouquet garni (boo-Kay gahr-NEE). That is just a fancy word for a little bundle of herbs and spices tied in cheese cloth. I didn't have cheese cloth but I did have a ton of coffee filters laying around so I used one of those instead. Make sure that it is tied well before tossing it in the pot. The herbs are kept separate so that your broth will stay clear.


TIPS for clear broth:
  • Watch your broth. As it heats, scum/ foam will start floating to the top. It's not bad if you leave it in, but it will make your broth cloudy. If you want, skim it out of your broth as it floats to the surface. Sometimes I care and sometimes I don't.
  • If you want clear broth, DO NOT LET YOUR BROTH BOIL. If your broth is allowed to boil then the scum and fat that floats to the top will get reincorporated into the stock before you have a chance to skim it.

4. Let your stock simmer between 4-8 hrs skimming the fat off as it rises to the surface. The longer you let it simmer, the more flavor will come out of the bones and the better it will taste.

When it is done simmering, remove all the bones, vegetables, bouquet garni and strain your broth. You can either use it right away, freeze it or can it.

I kept a jar out to use right away for turkey soup and decided to can the rest.

Pressure Canning Directions
  • Fill clean, quart-size mason jars to within a 1/2 inch of the lid with broth.
  • Screw on some heated lids and bands.
  • Arrange jars in pressure canner so that none of the jars are touching.
  • Fill canner to water line
  • Put on lid and process according to your canner's directions with venting, pounds of pressure for altitude and time. For me it was 13 lbs of pressure for 75 minutes since I was using quart jars.
  • Once processed, set jars aside to cool before dating your lids. Use your stock within 1 year.
Now you have an awesome stock to make turkey soup. If you don't want to make soup, you can use it when you make rice or other grains instead of water. Bone broth has so many healing properties, some like to just drink it plain. I would add more salt though to taste. Click here for my Beef Bone Broth recipe.

How to Can Ground Beef

I've been so busy that I haven't felt like posting lately. I have been canning though, I assure you. I've been keeping my eye on the price of ground beef for a while now and finally one of my grocery stores had it for $1.49/lb.
I hadn't ever canned ground beef before but I was looking forward to it since my chicken turned out to be so easy. 

Let's get started
Prep work. 
  • Make sure your jars are clean.
  • Start warming your jar lids on the stove. Do not boil, you just want the rubber rings to be gummy.

1. Get your meat. 
Usually you want to get the leanest meat you can. Canning it makes it super moist so it's a great way to use the less expensive cuts of meat and still have them be really juicy. The stuff on sale at my store was only 73% lean though so I made some alterations to the precooking process.

2.
Working in batches, brown meat. It took me about 3 batches to brown 5 lbs. I only did 5 lbs at a time because I changed the recipe for the next 5 lbs. And it is way less intimidating that way.

You don't have to brown your meat all the way, it's just for texture when you open the can. Some people don't like it really soft so the browning gives it some definition. As my meat was getting done, I would drain it, then stick it in a stock pot with a little water on low heat to keep it warm. 

Also, here's a little trick I learned about browning ground beef in Chemistry. If you stick a little water in the pan while it browns, the fat and the water don't like each other and the water keeps the fat from reabsorbing into the meat. Sticking the meat into the stockpot works the same way. That is why I wasn't too worried about using a fattier package of ground beef than usual. 

3.
When each batch of meat is almost done, dump some onions in the pan to cook a bit. You don't want them in there too long because they have enough time to cook in the pressure canner. You just want to mix them evenly in with the meat. I used about 1/2 and onion per pound of meat.

4.
Line up your clean jars and using a funnel, carefully spoon your meat into the jars. About 1 lb of beef fits into each pint sized jar. You need about 1 1/4 inches of head space because the ground beef won't expand like the chicken did since it is already cooked.

5.
But, because I'm not putting the meat in raw like I did the chicken breasts, the meat won't make enough of its own juice so I need to add some. This is some of the water from the stock pot that held the beef. It turned into a mild beef broth that I used to fill my jars with. I just used my gravy separator (which by the way, I love!) to make sure I didn't put any fat back in. Fill the jars to cover all the meat, keeping in mind your head space. As you pour, take a rubber (or non-metallic) spatula and work out any air bubbles that might be in the meat.

Option 2. 
On my second batch of ground beef, I used tomato sauce to fill my jars with. These jars I'm planning on using in spaghetti, sloppy joes, chili or anything that I would normally end up putting tomato sauce in anyway. This way the meat is already flavored. I watered it down by a ratio of 1:1 to make it easier to pour.

6.
If you want your meat seasoned a little bit more, put 1 tsp of pickling salt in each pint. The flavor will mix as it is in the pressure canner. Make sure only to use pickling salt. Regular table salt will make your jars turn foggy. You could also just put 1 tsp of  beef bouillon in instead.

7.
Make sure to wipe the rims of your jars really well with a hot, clean towel. You don't want any grease on the rim to prevent your lids from sealing.

8.
You are ready to put the lids on the jars. Use a magnetic lid lifter to avoid burning yourself. I've don't this one too many times when trying to just use a fork to lift them.


9.
Put your jars in your pressure canner, and follow the instructions that came with it for pressure and timing based on altitude. This is the Presto 1781 23-Quart Aluminum Pressure Cooker/Canner. For ground beef pints at my altitude I used 13 lbs of pressure for 75 min. For a step by step process in pressure canning check out my post on canning chicken. 

10. Ta Da!

So they might not be the prettiest looking jars of food, but believe me, it tastes fantastic. The tiny bit of congealed fat at the top is totally normal. I made tacos out of my first jar and no joke it was exactly like the taco meat you get at Taco Bell. Mmmm so good! I'm very happy with how it turned out. 

Don't forget to label your jars! This meat will stay good for a year or longer. If you have a jar that didn't seal, just stick it in the fridge and use it soon. It's fun to see how your meat turned out anyway.

As with any canned meat, the USDA recommends boiling/ heating the meat for 10 minutes once it is opened just to make sure all bacteria is killed.

Ground beef is one of the things I'd been wanting to try canning for a long time. I'm glad I finally did it and am happy to post about it. I'd love to hear some of the things you've been wanting to try too. 

Happy Canning